

On a parkade ramp in Surrey or a rooftop amenity deck in Vancouver, the coating is the part everyone sees. At BC Building Products, we find that most traffic coating failures we’re asked about come down to concrete surface preparation for traffic coatings, not the product. A good membrane on a poorly prepared slab will blister, pinhole or peel, sometimes within one season of BC rain and freeze-thaw.
Here’s how we recommend preparing concrete for a traffic, parkade or deck coating. One rule applies throughout: the coating manufacturer’s written specification always governs. Use this guide to plan the job, not to replace the data sheet.
Why Surface Prep Makes or Breaks a Traffic Coating
Traffic coatings bond mechanically and chemically to sound concrete. When prep falls short, you get:
- Poor adhesion: the coating bonds to dust, laitance or curing compound instead of concrete, and peels.
- Pinholes and blisters: air and vapour outgassing from porous concrete leave craters, and every pinhole lets water and chlorides in.
- Delamination: vapour pressure from a wet slab, or contamination, pushes the system off the deck over time.
Step 1: Confirm Concrete Age, Cure and Moisture
Concrete age and curing
Many coating systems call for about 28 days of cure, though some primers allow earlier application. Cool, damp Lower Mainland weather can slow drying well past the calendar date.
Moisture testing
Don’t guess. Test and record the results:
- ASTM D4263 (plastic sheet test): tape an 18 in × 18 in polyethylene sheet down for at least 16 hours and check for condensation or darkening. It’s a quick qualitative screen.
- ASTM F1869 (calcium chloride test): measures moisture vapour emission rate (MVER) in lb/1,000 ft²/24 h. It requires controlled ambient conditions, so it suits enclosed slabs.
- ASTM F2170 (in-situ RH probes): probes in drilled holes (typically 40% of slab depth for a slab drying from one side) measure internal relative humidity. It’s widely considered the most reliable indicator.
Limits vary by product. If readings are high, ask about moisture-tolerant primers or vapour mitigation before going further.
Step 2: Clean and Degrease
Parkades collect oil, tire marks, de-icing salts and grime. Remove them before profiling, because blasting or grinding an oily slab can drive contaminants deeper.
- Scrape and sweep loose debris.
- Scrub stains with a concrete degreaser and rinse thoroughly, repeating on soaked areas.
- Pressure wash to flush salts, then let the slab dry.
- Do a water-drop test: if water beads, contamination or a sealer is still present.
Step 3: Remove Laitance, Curing Compounds and Old Coatings
Laitance (the weak, powdery surface layer), curing compounds, sealers and failing old coatings are all bond breakers. Remove them to expose sound concrete. Acid etching generally isn’t an acceptable substitute for mechanical prep.
Step 4: Mechanical Profiling to the Specified ICRI CSP
The International Concrete Repair Institute (ICRI) Guideline 310.2R defines Concrete Surface Profiles (CSP) 1 to 10, with replica chips for comparison. Most traffic coatings specify CSP 3–5, and thicker systems generally need a heavier profile.
- Shot blasting: the workhorse for parkades and large decks. Properly set up, it typically produces CSP 3–5 and removes laitance while it vacuums.
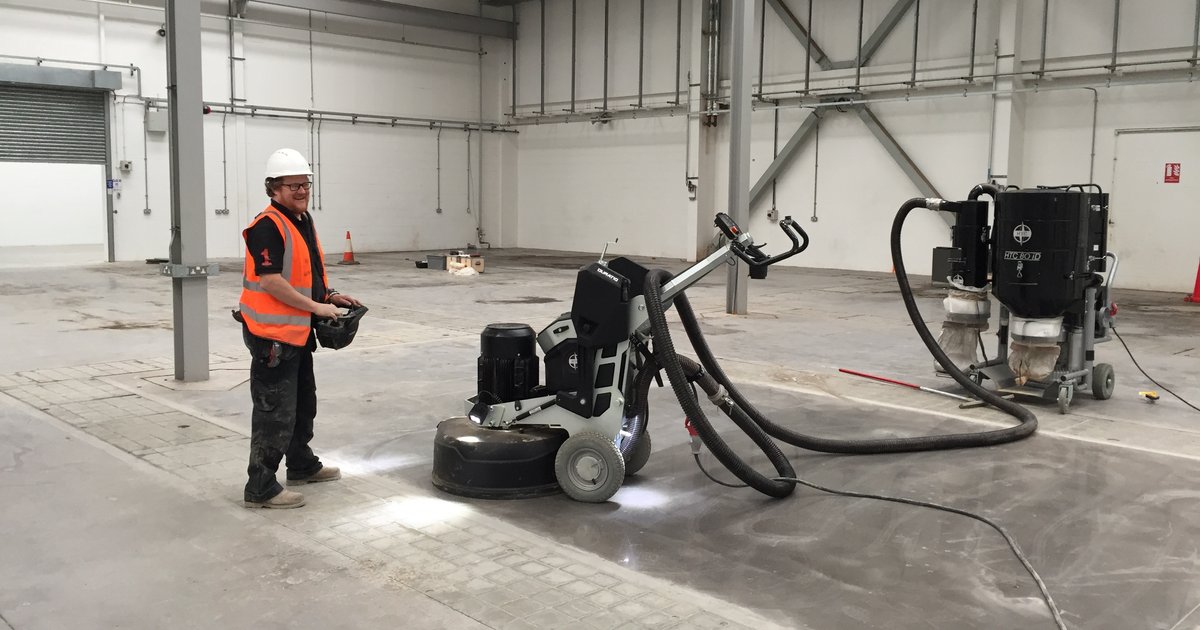
- Diamond grinding: ideal for edges, small areas, thin coatings and high spots. On its own it usually gives a lighter CSP 1–2, so check that against your spec.
- Scarifying (milling): aggressive removal of thick coatings or deteriorated concrete. It leaves a heavy profile (around CSP 4–7 and up) that may need a levelling coat.
Compare the result against the CSP chips and vacuum thoroughly. Use dust extraction throughout, since silica dust is a WorkSafeBC exposure-control issue.
Step 5: Treat Cracks and Joints
- Non-moving (static) cracks: rout, clean and fill with the specified sealant or crack filler. Most systems then call for a reinforced detail (stripe) coat.
- Leaking or structural cracks: consider crack injection: polyurethane for active leaks, epoxy for structural bonding, as directed by the engineer.
- Control and expansion joints: use the right sealant and backer rod or an expansion joint system. Never bridge a moving joint with rigid coating.
- Cove and upturn details: treat transitions, drains and penetrations as the system details require.
Step 6: Repair Spalls and Delaminations
Sound the deck with a hammer or chain drag to find hollow areas. Remove unsound concrete and saw-cut patch edges to avoid feathering. Clean exposed rebar and undercut behind it per ICRI guidance, then patch with a compatible repair mortar. Let repairs cure for the time on the mortar and coating data sheets.
Step 7: Prime at the Right Time
The primer ties the system to the slab and seals the pores that cause pinholes. Apply it at the specified rate, work it into the profile and respect the recoat window. Tip: prime when slab temperature is steady or falling (often mid-to-late afternoon) to reduce outgassing.
Step 8: Check Temperature and Dew Point
A common rule is that the substrate should be at least 3 °C (5 °F) above the dew point and within the manufacturer’s temperature range through application and cure. Measure and log the readings. In coastal BC, condensation on a cold deck is a leading cause of adhesion problems.
Common Mistakes We See
- Coating “dry-looking” concrete without moisture testing.
- Grinding only, when the spec calls for CSP 3 or higher.
- Coating over curing compounds, sealers or oil stains.
- Bridging moving joints with rigid coating.
- Priming a deck in direct morning sun as it heats up.
Surface Prep Checklist
- Review the coating manufacturer’s spec and data sheets.
- Confirm concrete age and cure, and run and record moisture tests.
- Clean and degrease, and check for sealers.
- Profile mechanically to the specified CSP, then vacuum.
- Rout and treat cracks, and detail joints and penetrations.
- Repair spalls and let repairs cure.
- Verify surface temperature and dew point.
- Prime within the specified conditions and recoat window.
- Consider pull-off adhesion testing (ASTM D7234) on critical projects.
FAQ
What CSP do traffic coatings require?
Most traffic and parkade deck coatings specify roughly ICRI CSP 3–5, but it varies by system and thickness. Always confirm the exact profile in the manufacturer’s specification.
Which moisture test should I use on a concrete deck?
ASTM F2170 in-situ RH probes are generally considered the most reliable. ASTM F1869 calcium chloride tests are also common, and the ASTM D4263 plastic sheet test is a quick screening tool. Use whichever method and limit the coating manufacturer requires.
Can I just pressure wash instead of shot blasting?
No. Pressure washing cleans, but it doesn’t remove laitance or create the required profile. Most traffic coating systems require mechanical preparation such as shot blasting or grinding.
How soon can I coat new concrete?
Many systems call for about 28 days of cure, plus passing moisture tests. Some primers allow earlier application. Follow the manufacturer’s data sheet.
Get the Right Products for Your Next Deck
We’re a family-owned building envelope distributor in Surrey, BC. We stock traffic and deck coatings, primers, concrete repair mortars, crack injection and joint sealants, and our team can help you match the right system to your substrate and schedule. Explore our traffic, parkade and deck coatings, download product specs from our Data Sheets library, or Request a Quote and we’ll get back to you quickly.